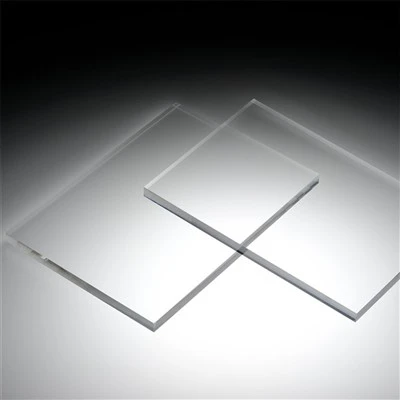
Clear acrylic sheets (also known as transparent PMMA sheets) are a staple in countless industries, from signage, light boxes, and retail displays to aquariums, architectural glazing, and electronic enclosures. Valued for their glass-like clarity, lightweight nature, and impact resistance, they offer a versatile alternative to traditional glass-yet their biggest downside is their vulnerability to scratches. Unlike opaque or glitter acrylic sheets, even minor scratches on clear acrylic are highly visible, as they disrupt light transmission and dull the sheet's transparent finish, compromising both aesthetics and functionality. For businesses and users relying on clear acrylic's pristine appearance, effective scratch prevention is essential. This guide breaks down why clear acrylic sheets scratch easily and shares industry-proven tips to keep them crystal clear and scratch-free.
Why Are Clear Acrylic Sheets Prone to Scratches?
 To prevent scratches effectively, it's critical to first understand their root causes. Clear acrylic sheets are crafted from high-purity methyl methacrylate (PMMA) resin through precision casting or extrusion, resulting in a smooth, transparent surface. Their susceptibility to scratches stems from three key characteristics, distinct from glitter or opaque variants:
Surface Hardness: Clear acrylic has a surface hardness of 2-3 on the Mohs scale-softer than glass, metal, sand, and even some everyday fabrics. This means common objects like keys, pens, dust particles, or rough cloths can easily leave scratches.
Transparent Surface: Unlike opaque sheets, clear acrylic's transparency makes even tiny scratches visible. A minor scrape that would go unnoticed on a colored sheet becomes a distracting blemish on clear acrylic, as it scatters light and breaks the sheet's uniform clarity <superscript:5>.
No Protective Coating (by Default): Many standard clear acrylic sheets lack a built-in scratch-resistant coating (unlike some premium variants). Without this barrier, the smooth PMMA surface is directly exposed to friction, dust, and harsh cleaning methods, increasing scratch risk.
Practical Tips to Prevent Scratches on Clear Acrylic Sheets
Scratch prevention for clear acrylic covers every stage-from transportation and storage to installation and daily use. The goal is to protect the sheet's surface while preserving its transparency. Follow these targeted, easy-to-implement tips to extend its lifespan and keep it crystal clear.
1. Protect During Transportation & Handling
Most scratches occur during transportation and handling, when the sheet is exposed to friction, dust, or sharp objects. All high-quality clear acrylic sheets come with a protective film (paper or plastic) on both sides-keep this film intact until the sheet is ready to be installed or processed. This film acts as a barrier against dust, scratches, and minor impacts, preventing damage before use.
When moving or carrying clear acrylic sheets, never drag them across hard surfaces (floors, tables, workbenches)-always lift them gently with both hands, supporting the entire sheet to avoid bending (which can also cause stress scratches). For large or heavy sheets, wrap the edges and surface in a soft blanket or foam pad to prevent contact with sharp tools, metal surfaces, or debris. When stacking multiple sheets, place a clean, soft cloth or foam between each one to avoid friction-induced scratches.
2. Store Properly to Preserve Clarity
Improper storage can lead to scratches even when the sheet is not in use. Store clear acrylic sheets in a cool, dry, and dust-free environment, away from direct sunlight, high temperatures, and humidity. High humidity can cause dust to stick to the surface, while prolonged sunlight or high temperatures may warp the sheet, leading to uneven contact and scratches.
Store sheets vertically (preferred) or lay them flat on a smooth, clean surface lined with a soft pad or microfiber cloth. Ensure the storage area is free of sand, dust, or sharp debris that could fall on the sheets and cause scratches. If the protective film is accidentally removed before use, cover the surface with a clean, lint-free cloth to prevent dust accumulation and scratches.
3. Clean Correctly (Avoid Damaging Transparency)
Dust and debris on clear acrylic act as abrasives-regular cleaning is necessary, but the method must be gentle to avoid scratching or hazing the surface (which ruins transparency). Follow these steps for safe, effective cleaning:
First, remove loose dust and debris with a soft, lint-free microfiber cloth or a feather duster. Never use rough cotton cloths, paper towels, or scrub sponges-these are abrasive and will scratch the surface.
For fingerprints, grease, or light stains, use lukewarm water mixed with a small amount of mild, neutral-pH dish soap. Dampen the microfiber cloth with the solution (do not soak the sheet) and gently wipe the surface in a circular motion-avoid scrubbing hard.
Rinse the cloth with clean water and wipe the sheet again to remove soap residue, then dry immediately with a clean, dry microfiber cloth to prevent water spots (which can also mar clarity).
Never use harsh chemicals: ammonia-based glass cleaners, alcohol, acetone, or abrasive cleaners (like baking soda) will haze the surface, damage the PMMA, and make the sheet more prone to scratches.
4. Choose Scratch-Resistant Variants (When Possible)
For high-traffic or high-risk applications (such as retail displays, public signage, or aquariums), invest in clear acrylic sheets with a built-in scratch-resistant (SR) hard coat. These sheets have a thin, durable coating (4-5H hardness) applied during production, which significantly improves scratch resistance while preserving transparency.
SR-coated clear acrylic is more resistant to everyday wear, dust, and minor friction, reducing the need for frequent maintenance. While slightly more expensive than standard clear acrylic, it saves time and money in the long run by extending the sheet's lifespan and maintaining its pristine appearance.
5. Install Carefully to Avoid Scratches
Improper installation is a common cause of scratches on clear acrylic. Before installation, ensure the mounting surface is clean, smooth, and free of sharp edges, dust, or debris. Remove the protective film only when the sheet is ready to be mounted-this minimizes exposure time and reduces the risk of scratches during installation.
When cutting or drilling the sheet, use sharp, high-quality tools designed specifically for acrylic (such as carbide-tipped blades or drill bits) to avoid rough edges or friction-induced scratches. Place a soft pad under the sheet during cutting to prevent contact with the hard workbench. For installation, use soft, non-abrasive fasteners (like plastic or rubber screws) and wrap metal tools in a soft cloth to avoid direct contact with the clear surface.
6. Daily Use & Long-Term Maintenance
In daily use, avoid placing sharp objects (keys, pens, scissors) directly on clear acrylic surfaces, and never drag heavy objects across them. For countertop displays, aquariums, or light boxes, use coasters or protective mats to prevent scratches from objects placed on the surface.
Regularly inspect the surface for loose dust or debris-clean it promptly to prevent these particles from causing scratches during contact. For outdoor applications (like signage or glazing), clean the sheet every 1-2 weeks to remove dust, pollen, and dirt that can accumulate and scratch the surface over time.
 How to Repair Minor Scratches (Without Ruining Transparency)
Even with proper care, minor scratches may still occur on clear acrylic. The good news is that shallow scratches (those that do not penetrate the entire thickness of the sheet) can be repaired to restore clarity. Here's how:
For very shallow scratches: Use a dedicated acrylic polish or plastic scratch remover. Apply a small amount of polish to a clean microfiber cloth and gently buff the scratch in a circular motion until it fades. Wipe away excess polish with a clean cloth to restore transparency.
For slightly deeper scratches: Use a fine-grit sandpaper (1000-2000 grit) to gently sand the scratch in one direction (avoid circular motions). Follow with a finer grit sandpaper (2000-3000 grit) to smooth the surface, then apply acrylic polish to restore clarity.
For deep scratches that penetrate the sheet or cause significant hazing, it's best to replace the sheet-repairing deep scratches often results in uneven transparency, which is more distracting than the scratch itself.
Final Thoughts
Preventing scratches on clear acrylic sheets is all about being proactive: protecting the surface during every stage of use, using gentle cleaning methods, and avoiding contact with abrasive objects. By following these tips, you can keep your clear acrylic sheets crystal clear for years, preserving their transparency, aesthetics, and functionality.
When selecting clear acrylic sheets, choose high-quality products from reputable suppliers-look for sheets with uniform transparency, intact protective film, and optional scratch-resistant coating. If you need customized clear acrylic solutions or more professional advice on scratch prevention for specific applications (like aquariums or signage), feel free to contact our team for support.